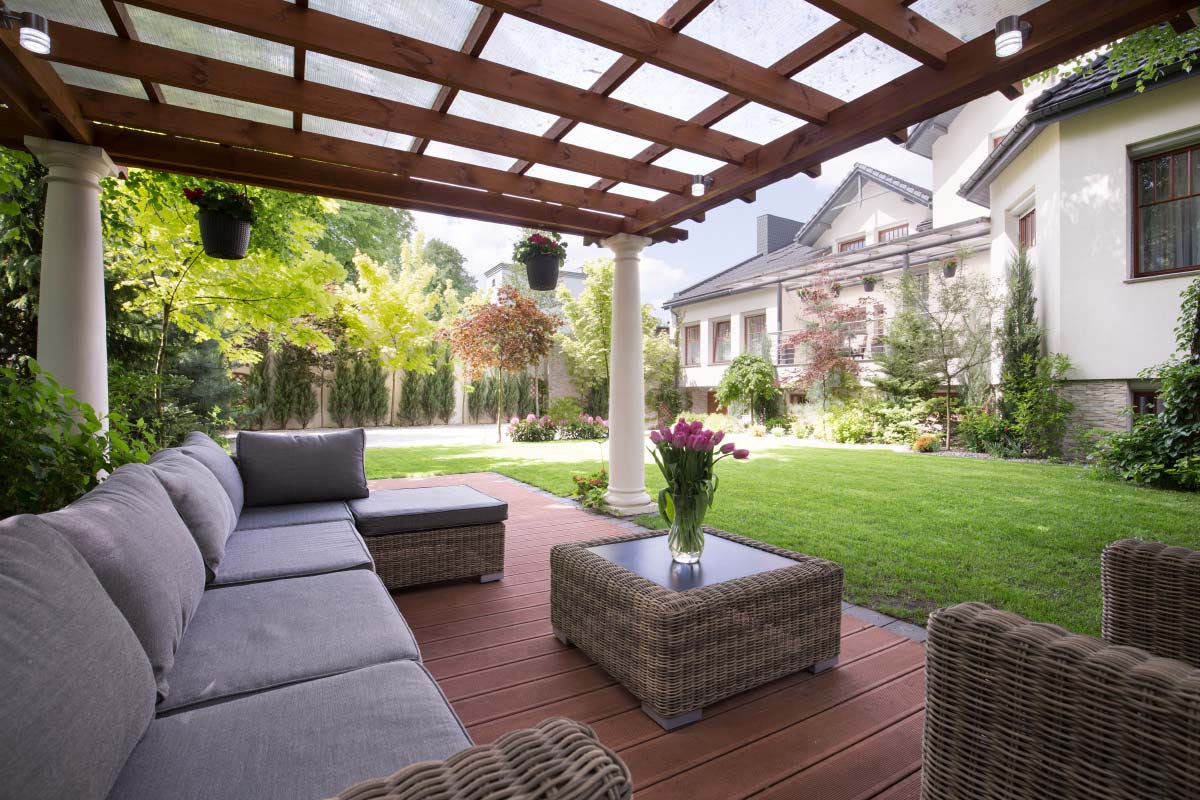
5 Reasons To Get a Garden Pond

Garden ponds are beautiful, vibrant, and endlessly entertaining. You might be thinking that they are impractical, too expensive, or too complicated to maintain. But these myths are simply not true, and there are many benefits that come with a garden pond.

Increase Property Value

Having a garden pond greatly increases your home’s property value, making it a financially worthwhile investment. It sets your home apart from the rest and adds a unique touch of vitality to your garden. For prospective homeowners who enjoy nature and wildlife, a garden pond could make just the difference.

Take Advantage of Yard Space

Green grass is beautiful in its own right, but there are many less-explored alternative gardening options that can breathe new life to your property. If you have a decently-sized yard, chances are that you are left with a good amount of unused yard space. Many homeowners start off with a relatively small pond, which takes up less space than you think. If you are still hesitant about garden ponds, dip your toes into the idea by installing a small pond. Most of your property will remain untouched and available for other projects.

In cases where fallen trees or other accidents have left your yard with a gaping hole, take advantage of even that and consider installing a small pond. As they say, when life gives you lemons, make lemonade!

Replace Street Noise With Relaxation

Science can’t quite explain why people all over the world are as attracted to water as we are. What we do know, however, is that being by large bodies of water induces a mildly meditative state in most people. It invokes feelings of awe and connectedness, which can inspire an increased capacity for connection and empathy. Unfortunately, most of us do not live right by the ocean. Garden ponds, therefore, mimic the sound of running water and can help you relax better.

This is especially relevant if you live by a moderately busy road and hear street noises and cars regularly. Garden ponds will help to mask unwanted background noise and replace it with the peaceful bubbling sound of running water. Water features such as small waterfalls will help you and your family members unwind after long days or difficult moments.

Step Into Water Gardening

As beautiful as regular gardening is, water gardening is rewarding, lush, and unique. Floating plants, as the name suggests, grow exclusively in water and add a delicate touch to pond surfaces. Because most floating plants absorb nutrients from the water, they usually do not need supplemental fertilization. Be warned, however, that many floating plants can quickly cover a pond’s surface and must be manually removed. Floating plants, like water lilies, are captivating and colorful. Marginal plants, such as irises, grow on pond edges and add vertical height to the surrounding area of your garden pond.

Attract Wildlife

Most people add koi or other fish into their pond for a colorful mix of life in their garden pond. But also remember that any water source, including man-made ones, will attract wildlife. Birds, bees, and dragonflies will stop for a drink. Beneficial insects, like bees and butterflies, will pollinate your garden, while birds will help to control pest populations. An entire ecosystem can be brought into your own backyard from a single garden pond. Watch your backyard flourish brilliantly before your very eyes.


If you are indeed considering a garden pond for your property, be sure to find a highly-rated, fully-insured, and experienced landscaping company, such as Giovine Landscaping Inc. Many things can go wrong when working with man-made bodies of water. Get the absolute best for your property and watch your garden be transformed immediately.

How To Get A Step Ahead of Crabgrass

We’ve all seen crabgrass before, even if we didn’t know its name. Whether on a lawn, along a driveway, or out of a crack in the sidewalk, these weeds are notoriously tough to combat. Because it spreads thousands of seeds throughout its lifespan, the weed spreads quickly and aggressively, even from one lawn to the next. They also grow low on the ground, meaning that they escape the mower blade. These pesky weeds even hold up well with high amounts of foot traffic and do not mind being tread upon. While this all sounds like bad news, the good news is that there are ways to fight against it. Since spring is right around the corner, now is the time to start planning ahead to get rid of crabgrass.

When Is The Right Time?

Crabgrass flourish in the summer heat. That’s why the best strategy against it is to stop its growth in the spring. Crabgrass spreads through seeds, meaning that if you can stop the seeds from germinating, you can end the infestation. According to the Soil and Microbial Sciences Department of Michigan State University, crabgrass seeds begin to germinate once the soil reaches about 50 to 55 degrees Fahrenheit. You can buy an inexpensive soil thermometer to check the temperature of your lawn. Once the soil nears this threshold, apply a crabgrass preventer or a fertilizer with a crabgrass preventer. Try to do this right before a rain shower, which will help the fertilizer and preventer to work into the soil.

It’s important to get the timing right. Apply the treatment too early and the herbicide’s active ingredients will be broken down prematurely, rendering it ineffective on the crabgrass. Apply it too late, and crabgrass seeds have already germinated and grown into seedlings. At this point, the pre-emergence treatment will be completely useless. We recommend erring on the side of caution and applying the herbicide earlier rather than later.

What’s Next?

You’re not done yet! Most crabgrass preventers have a life of about 50 days, although lifespans can vary based on the brand. After this time frame, re-apply another layer where crabgrass tends to thrive, such as along driveways and walking paths. The soil in these areas absorb more heat and encourage the growth of crabgrass.

If you see crabgrass growing, pulling them out is a good idea. However, be careful not to pull out mature crabgrass, which will only spread more seeds. Mature crabgrass has thin, forklike protrusions with dozens of seeds in them.

What About My Regular Grass?

Pre-emergence crabgrass treatments will also kill good grasses, such as bluegrass or ryegrass. For this reason, if you choose to use this type of herbicide, you cannot seed. What you can do, however, is to seed in late summer or early fall. The key is to keep the two tasks at least 8 weeks apart.

Crabgrass is not easy to handle. If you find that you do not have the time or physical energy to combat crabgrass, we recommend reaching out to a reliable and experienced lawn care company, such as Giovine Landscaping. A team of professionals in the industry can examine your lawn and provide you with the best plan of action against crabgrass.

Do some research today while you have some buffer time before spring arrives. Look into soil thermometers or the right type of crabgrass treatment for your lawn. Speak to a professional in lawn care for their recommendations. Schedule an appointment. It’s never too early to start thinking about how to fight crabgrass.

How Can I Start Winter Sowing?

For garden-lovers, winter in the Northeast can be a less exciting time than the spring and summer. However, there is indeed a way for you to do something for your garden in the winter. This method is low-cost, effective, and will produce hardier seedlings than those grown indoors.Don’t believe us? Just keep reading to discover the possibilities of winter sowing.

What Is Winter Sowing?

Different seeds emerge out of dormancy through different methods. Some seeds merely require some soaking or scratching. However, other seeds require cold stratification, or exposure to the cold, to break out of their dormant stage. As explained by Pennsylvania State University, cold temperatures allow oxygen to permeate into the seed and encourage it to digest some of its food reserves, giving the seed sufficient energy to germinate. In short, winter sowing is a method of cold stratification that takes up absolutely zero space in your home.

Winter sowing starts seeds completely outdoors in the wintertime. It works through miniature greenhouses made from recycled plastic containers, which are then left outdoors. Once the weather begins to warm up, the seeds will grow at their normal pace. Winter-sown seedlings have no risk of damping off, when new seeds and seedlings become water-soaked and quickly die. Because these seedlings grow outside from the beginning, they also do not need to be gradually exposed and introduced to the outdoors, a process known as hardening off. All things considered, winter sowing will make your life and the life of your garden considerably easier.

Prepare Your Mini Greenhouses

The first step to winter sowing is to prepare the “mini greenhouses” for your seedlings. These are made of transparent or translucent plastic, such as milk jugs, liter bottles, or other similar containers. It must be deep enough to allow for two to three inches of soil at the bottom, and tall enough for seedlings to grow.

After you have chosen your container, make sure to clean it thoroughly. If you are using a milk jug or tall container, cut the container in half horizontally.

Poke Some Holes

Using a knife or drill, poke the same amount of holes in the top and bottom of the container to allow for venting and draining. Rain and moisture will be able to enter and drain out. The holes will also prevent the “greenhouse” from overheating.

Add All-Purpose Potting Soil

Add a layer of high-quality, all-purpose potting soil. A layer that is about two to three inches is sufficient. Never use soil from your garden in your containers!

Plant The Seeds

For winter sowing, marigolds, poppies, brussel sprouts, carrots, leek, and spinach are just some seeds that should grow well. For more ideas, refer to this list.

On the seed packet, look for terms like “self-sow,” “direct sow in fall,” “direct sow in early spring,” “needs stratification,” or “needs pre-chilling.”

Label Your Containers

By the time spring rolls around, there’s a good chance that you won’t remember what you have sown. Be sure to label your containers using a permanent marker or masking tape.

Water The Seeds

Water your soil thoroughly and allow the containers to drain before moving them outside.

Close Up The Containers

Place the lid of your container back on, making sure that it snaps shut. If you have cut your container in half, simply attach the half back on using duct-tape. In this case, be sure to leave the caps off. Make sure that the tape does not cover the ventilation and drainage holes.

Put the Containers Outside

Finally, put your containers outside in a place that receives plenty of sunshine and moisture. However, make sure that the containers are not exposed to heavy wind.

Retrieve Containers in Spring

Don’t worry if your containers are covered by snow. Once the weather warms up, check the containers regularly for signs of seedlings. Make sure that the seedlings do not overheat and that the soil inside is adequately moist. If you notice soil drying out, add water through the ventilation holes. When the seedlings are finally tall enough to reach the top of the container, you can remove the lids. After the lids are removed, check the seedlings daily and water when necessary.

Transplant Your Winter Sowing To Your Garden

You can transplant these seedlings at the same time you would plant anything else in your garden, depending on where you live.
Winter sowing will bring joy to your gardening life when springtime rolls around! You won’t need to purchase grow-lights, heat mats, or other accessories that require money and space. The seedlings themselves will grow beautifully when they are planted. If you find that you have questions about gardening or your lawn, contact a lawn care professional in your area, like Giovine Landscaping, for personalized information. We are happy to help you build your garden from the ground up.

What is Lawn Dethatching and Why Do I Need To Do It?

We bet that you didn’t know about all the work required to upkeep a beautiful lawn until you had your own lawn to take care of. We understand that not everyone is an expert on grass and turf. If you’ve never heard of the term dethatching before, or you’ve heard of it but have no idea what that means, read on to find out if lawn dethatching is in your future lawn-care plans.

So What Is Lawn Dethatching?

In order to answer this question, we first need to explain what thatch is. You may think of thatch as that quaint material that old English cottage roofs are made of.

Cottages with thatched roofs after lawn dethatching.
Thatched cottages at Cadgwith Cove, Cornwall, England

However, you don’t have to live in the English countryside to have thatch. Thatch can be found in anyone’s lawn anywhere in the world. Over time, tiny bits of grass die and accumulate on the soil. This forms the basis of thatch. It is a layer of living and dead stems, roots, and crowns right above the soil surface. If you take a look at your lawn, thatch will look like browned grass stems matted together.

In moderation, thatch is actually beneficial for your lawn. As reported by the Penn State Department of Plant Science, less than ½ inch of thatch helps to insulate your lawn from extreme weather, protect weed seeds from reaching the soil and taking root, and help the soil retain moisture.

However, any thicker and thatch will act as a foe against the health of your lawn. Excessive thatch increases the risk for pests and diseases to thrive. Not only does it reduce the ability of fungicides and insecticides to penetrate the soil, but it also reduces the amount of moisture and oxygen that can reach roots.

How Can I Tell If I Need Dethatching?

There are multiple ways to tell if thatch has built up on your lawn. First, upon walking on your lawn, you will notice that it is spongy. When you try to stick your fingers (or a screwdriver) into the soil, you will find it difficult to do so. Lastly, you will see that water will run off the grass rather than penetrate it.

If you’ve noticed any of these signs, or a combination of multiple, your property is in need of lawn dethatching.

How Do I Dethatch My Lawn?

Generally, there are two ways to dethatch lawns. The first is to use a dethatching rake, which will rip the layer right out of your lawn. By hand, you must dig deep into your lawn and pull upwards to loosen the thatch apart. When doing this, the thatch should be visible. Your lawn will look visibly ragged after this and will need to be cleaned up.

If you have a large lawn, you can consider the second method, which uses a power dethatcher. You can rent this tool from a rental agency, which should supply you with instructions. Dethatchers are heavy, and you may need not only a truck but also (at least) one spare pair of hands for loading and unloading. When using the dethatcher, you must also be careful to use it in a pattern that covers the grass only once.

Given that the process of lawn dethatching is time-consuming, technical, and physically taxing, it’s no wonder that thousands of homeowners choose to hire a professional agency to take care of the job. If you choose to opt for this alternative, make sure you choose a reputable landscaping company, like Giovine Landscaping Inc., to help you achieve a healthy, flourishing lawn. Don’t let thatch get in your way.

Everything You Need To Know About Your Lawn

For better or for worse, the first thing we see when looking at a home is its lawn. Before we even get to step inside and admire the interior, our first impression forms right as we walk up to the front door. In order to keep your property looking its best, regular lawn fertilization is a necessity.

How Does a Well-Maintained Lawn Affect Your Home’s Curb Appeal?

For a relatively insignificant cost, proper and professional care of your lawn will bring you high returns. A beautiful home exterior tells potential buyers, neighbors, and passersby that your home’s interior is equally appealing. For potential buyers, a well-maintained lawn means fewer initial costs coming out of their pocket, which drives up the desirability of your home. An attractive lawn even benefits your neighborhood as a whole and increases its marketability. Trust us, your neighbors will be thanking you.

How Do I Take Care Of My Lawn?

The key to maintaining a lush, green lawn is regular fertilization. Most existing nutrients in lawns are water-soluble and will be diluted and washed away over time. Sometimes, soil might not naturally produce the necessary nutrients for a healthy, full, and even lawn. This increases its vulnerability to stressors such as extreme weather, disease, weeds, and pests. Your lawn can be left with uneven discoloration, browning grass, and overall patchiness. This is no way to make a first impression!

When Should I Fertilize My Yard?

If you live in the areas of Essex, Morris, and Union Counties in New Jersey, chances are that your lawn has cool-season grass. This type of grass typically remains green all year round and grows throughout the year, except during mid- and late-winter. Fertilization is recommended twice a year, once in early spring and a second time during the fall, around October and November.

Why Is Lawn Fertilization Tricky to do on Your Own?

Although there are online resources on DIY lawn fertilization, this is a job that should be left for professionals. According to research from the Division of Agriculture in the Department of Arkansas, there are many factors to consider in turfgrass maintenance. Firstly, you must have your soil’s pH level tested and the soil type identified. The pH levels contribute directly to grass health and nutrient uptake, and can indicate a mineral deficiency. Improper pH levels result in ineffective use of fertilizer, as well as increased pest problems.

It is crucial to have your unique landscape evaluated by certified professionals before anything is applied to your lawn. On top of that, you must accurately calibrate the spread of your fertilizer based on a careful measurement of your lawn. Application of nitrogen requires precise timing and vary by turf species.

All in all, a healthy and proper lawn fertilization is no easy task. We strongly advise leaving this in the hands of experts and professionals. If you want to keep your valuable property in its best shape, the team at Giovine Landscaping Inc. can help. We provide unparalleled service and pride ourselves in our precision and professionalism!

Top 5 Benefits of Having a Fire Pit

Fire pits have increased in popularity all over the country. A 2016 survey performed by the American Society of Landscape Architects (ASLA) ranked fire pits as the number one outdoor design element requested by consumers. But fire pits are not just another trend cruising on by with no intrinsic value. Having a fire pit in your yard actually brings you several benefits, which makes it a worthwhile, pretty affordable (depending on the kind of fire pit you choose, of course) investment. Below are five real, tangible benefits of having a fire pit aside from just, “it’s cool.” (Which it is!)

Keeps mosquitos away.

Say what? An outdoor activity that DOESN’T include getting devoured by mosquitos? It turns out that mosquitoes don’t like smoke, and if you plant a few bug-repelling plants or light some citronella candles around your fire, you’re even more protected.

A bigger barbecue.

You can literally cook any type of food on a fire pit, and your cooking area is bigger than on a barbecue. Just place a grill on top and get those steaks sizzling. Burgers and hot dogs are a given, but you can use a frying pan and make eggs, pancakes, and grilled cheese, too. For a real family tradition, whip up some Rocky Mountain Toast (cut a hole in a slice of bread, crack an egg into it, and fry it on the skillet. Tastes delicious with some campfire smokeyness to it!). Experiment with different kinds of wood to infuse different flavors into your food.

Family quality time.

I’ll amend that–family quality time away from the TV. For thousands of years, humankind has gathered around the fire to socialize, tell stories, and connect. It’s hard these days to entice the kids-and adults!–away from the ever-beckoning television, especially in the era of Netflix, Hulu, and Amazon Prime. But it’s in our blood to enjoy sitting around the fire, so light up your fire pit and gather your family together for some cozy, quality time making memories that will last forever.

Reduces blood pressure.

Wait. Seriously? Yes! A University of Alabama study done by Christopher Dana Lynn showed that just 15 minutes sitting in front of the fire caused both the systolic and diastolic blood pressure of participants to go down by several points. According to Lynn, evolution may be the reason we relax when listening to a crackling fire. Being able to destress and clear your head actually helped with survival in the days of the cavemen, and that’s pretty much still true today. Stress is a killer, literally.

Increases home value.

With the former four benefits, of course it increases your home’s value. Fire pits are in demand and they extend the living space of your house, which makes your overall property more desirable.

At Giovine Landscaping, we are happy to build the fire pit of your dreams! We have been providing year-round landscaping services to families and businesses for over 30 years.  

We work closely with our clients to get to know their family, their needs, and their outdoor space, and we make sure all our clients end up with a final product they love!