Most people do not give much thought to how their landscaping decisions impact the environment, but this is a mistake. There are many ways your landscaping can positively impact the environment. Your landscaping decisions can have a large impact on local ecosystems, wildlife, and even water quality. Household runoff-related pollution plays a major role in polluting New Jersey rivers, lakes, streams, beaches, and drinking water. Thankfully, there is a way for homeowners to help fight against flooding and water pollution, while simultaneously adding a beautiful new feature to their landscape design: installing a rain garden. Our landscaping experts at Giovine Landscaping have compiled this guide for rain gardens, to help educate homeowners about this versatile, helpful, environmentally friendly, and beautiful landscape feature.
What are rain gardens?
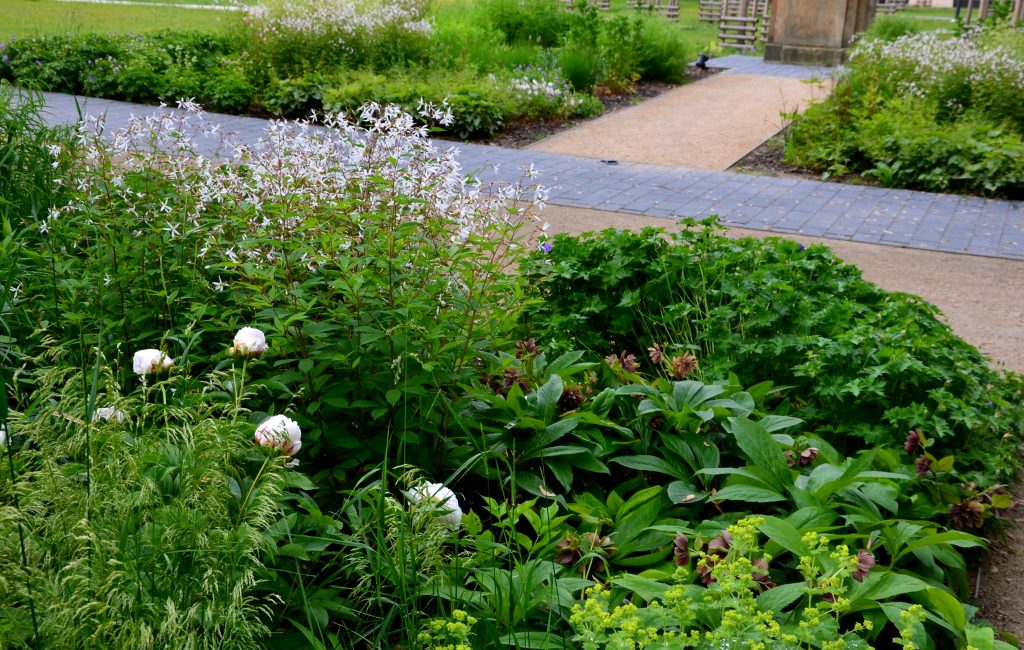
Rain gardens are plantings installed in shallow depressions, filled with native plants selected for their ability to capture, temporarily hold, and filter water back into the ground. They can be installed in both natural depressions and purpose-built human-made indentations. Rain gardens are useful for fighting flooding on your property because they collect water that flows from impervious surfaces like your roof, driveway, patio, paths, or waterlogged yard. These gardens are also beneficial for the environment because they can trap any pollutants on your property. Pollutants like pesticides, fertilizers, pet waste, motor oil, gasoline, automotive chemicals, household cleaners, and more, are held back from entering waterways by rain gardens. Rain gardens are also a beautiful and interesting landscaping feature that can be used to display numerous types of plants.
6 Rain Garden Design and Management Tips
1. Rain gardens should always be placed at least 10 feet away from your house.
If your rain garden is installed less than 10 feet away from your home, you will risk water seeping into your basement or foundation. You should not place your garden above a septic tank or near any underground utility lines. It is best to select a spot that receives a decent amount of water and is located between two impervious surfaces, like your roof and the street, to maximize the rain garden’s effectiveness at catching water.
2. Test your selected rain garden spot to ensure proper drainage.
A rain garden is not a pond. It is important to design your rain garden so that water drains within 12-48 hours after a typical rainstorm, to prevent mosquito breeding and other issues. Before you add any plants, you should conduct a water-absorption test. You can dig a hole in your proposed rain garden installation area that is 12 inches deep and 6 inches wide, and fill it with water and a ruler. Observing this area over a four-hour period will allow you to calculate the rate of absorption in inches per hour, to ensure the site is suitable for a rain garden. If the soil is not draining fast enough, you may need to amend the soil and/or focus more on selecting plants that will aid in absorption. For instance, adding more sandy soil to your rain garden will help it drain more quickly.
3. Your rain garden should be at least 7 to 20% the size of the impervious surface creating the runoff.
The USDA Natural Resources Conservation Service recommends that rain gardens should be between 7 and 20% the size of whatever impervious surface is creating the runoff that the garden is collecting. Typically, the largest impervious surface on your property will be your roof, so your rain garden should be 7 to 20% of your roof’s size to unlock its full environmental benefit. Still, even a smaller rain garden can be a beautiful landscape feature that reduces flooding and water pollution, while also benefiting wildlife through its native plantings. A rain garden that is 30% smaller than the ideal size for your property’s impervious surface area, will still be able to handle almost 75 percent of the storm watershed from a house.
4. Pick the right plant species
It may seem intuitive to select only water-loving or even aquatic plants for a rain garden, but this is not the right strategy. Your rain garden will be dry a lot of the time, especially around the edges, so you need plants that can tolerate both very wet soil and dry soil. You will need to plant species that require different moisture levels in different sections of your rain garden. You will also need to plant species that will be able to tolerate dry soil around the edges, species able to thrive in dry or wet conditions on the slopes, and moisture-tolerant species in the center.
All of the plants you select should be native perennials because these plants generally have deep root systems that will aid in water absorption. Plant species like black-eyed Susan, false indigo, coneflower, sedge, aster, daylily, iris, sedum, and native grasses thrive inside rain gardens. Plants like butterfly weed, gaura, coral bells, yarrow, and catmint make great plants for the edges of your rain garden. You can even plant a small tree or shrub species in a rain garden, like river birch, pawpaw, or oakleaf hydrangea. Whatever species you select, be sure to select a mix of plants with varied foliage, bark texture, and blooming periods so that your rain garden is interesting and beautiful all year long!
5. Integrate your rain garden with the rest of your landscaping.
Your rain garden will be part of your overall landscape design, so it makes sense to integrate it with the rest of your landscaping. For instance, if you have a very orderly, manicured landscape, you may want your rain garden to be planted in this way as well, so it all matches. You can also line the outside of your rain garden with other decorative plants to further integrate it. Consider using the same kinds of decorative rocks both inside and outside of your rain garden. You can also consult with our landscape design experts at Giovine Landscaping, for other ideas for integrating your rain garden into your property’s overall landscape.
6. Make sure your rain garden gets enough water during dry periods and maintenance in general.
A new rain garden should be watered about an inch per week during any dry spells the year following installation, to allow your plants to establish themselves. After the first year, watering your rain garden deeply, but infrequently during times of drought, is best to encourage healthy root development. You should also prune your rain garden plants according to the needs of your specific species, and take care to remove weeds and debris that threaten to disrupt your garden. You can also further suppress weed growth by adding a 3-inch layer of fine hardwood mulch. It is important to use hardwood mulch, specifically, for this task because pine bark and wood chips will be washed out of your rain garden.
Contact Giovine Landscaping
If you want to install a rain garden or make any other changes to your landscape design, please contact Giovine Landscaping so that we can help you build the yard of your dreams!